Using the Audacity editing software, you have several options for adding audio tracks. Either they come from audio files already on your computer's hard drive, or you record them directly from your microphone. We are interested here in the recording of the microphone.
Choosing the source of your microphone
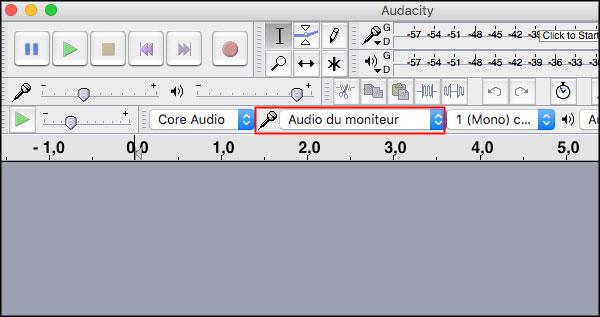
This will all depend on your hardware, but you can have more than one source. It could just as well be the built-in microphone in your monitor, or it could be a third-party microphone. Depending on your setup and audio capture preferences, you will first select the source. This will be done from this drop-down menu:
In our case, we will select the microphone of our headphone/microphone device, here connected via USB. But it could very well have been connected by a traditional headphone socket.

Once the source has been chosen, we will activate the visualization of the sound input in the software interface. You can do this by clicking on the microphone icon.
Then choose View Input from the context menu:
You will find that only one line will be active. By default, the recording will be in mono, but you are free to have it in stereo. This will then happen in this drop-down menu:
Start recording the voice
During your recording, which you activate via the red button framed below, you will see the visualization appear and the sound spectrum take shape as you go. as you go.
The objective is that the red zone is not reached to avoid many problems during the final mix. If this zone is reached, then be sure to lower the general volume of the sound recording. It happens here:
Now it's your turn to compile your voice with other audio tracks.
Posted On 07/13/2016 at 08:57 by Frédéric Santos


Farewell Touch Bar, I won't regret...
Caddy, the only web server to use H...
Burkina Faso / Gabon (TV / Streamin...
What the future of work will not b...